Go big or go home! 4 pieces 44" x 40".

7 Likes
Looks real good. Looks like everything lines up as it should. Nice work.
1 Like
Awesome Steve! Guess I’m going to have to try that type of tiling. How did you align everything?
1 Like
That came out awesome!! Very nice
1 Like
Looks great!!!
1 Like
Not as perfect as I would like, I am going to assemble 2 pieces at a time so I can massage the middle seem just a little bit. To help everything line up I rotated each piece so the point was in the bottom left corner of the waste board then I zeroed at 1" in.
Getting everything to overlap correctly was a pain in the booty!
Hope these help Phil


7 Likes
Looks good! That is the process I had to do with a Hogwarts crest (because of the amount of nodes not size)
Cant wait to see that one finished
Looks great! Looking forward to the finished images.
Steve,
Do you share your patterns? You have several that I’m interested in. Beautiful work!
Walt
Steve,
I love your patterns. Would you share?
Walt
Steve,
Love your Flags man! What do you use to get the proper dimensions?
I also have a question on your St. Ursula sign…
Is that PVC? Do you spray paint the whole thing black then mask and carve the rest? Is everything else hand painted or do you carve color specific and use spray paint?
If its hand painted could you provide what brush you use because the ones I’m using always seem to leave brush marks.
Thanks!
Thanks for the kind comment!
Here is were I got my flag dimensions from
The Ursula sign is PVC, Depending on the paint it takes a minimum of 2 coats reds are three no matter how you do it.
Below are the brushes I recently purchased at Michael’s, my favorite ones I picked up off a table at the myrtle beach car show in the swap meet. They are wearing out, no idea of the make. The key seems to be the paint. Buy the better paints at Michael’s.
Hope that helps Steve


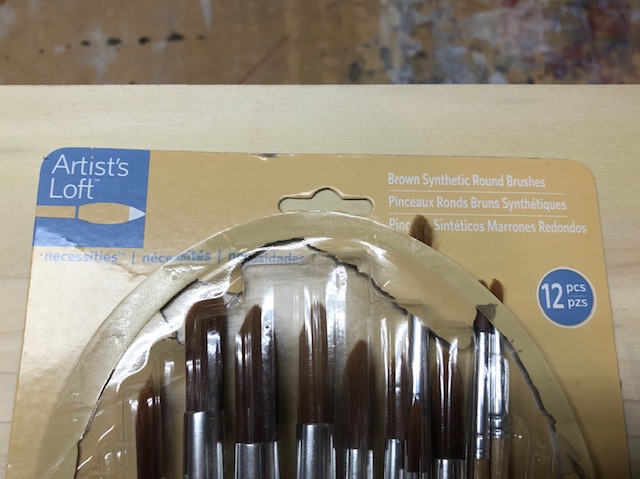
2 Likes
Steve,
Check out Home Depot.
They have some nice small brushes.
I think they come like 4 to a pack (different sizes)
That’s where I got mine.
On your St. Ursula sign do you spray paint the whole thing black then mask and carve the rest?
I will check them out these ones I got from Michaels are working out pretty well.
Correct spray with Rustoleum 2X, let it dry for 24hrs then Oramask and carve. I have found if you have large areas to remove I do the detail pass first with my 45 bit, peel out the large areas then do the roughing pass. The roughing pass tends to pull up the Oramask. I get cleaner results this way. I use the Amana bit with the changeable carbide blade.
1 Like
Steve, got a link to the Amana bit? Thanks.
These are the bits that Steve uses, he recommended them to me and they work great.
You can purchase the bits individual or a set.
Good Luck and Stay Safe
Russell
https://www.toolstoday.com/v-14516-ams-153.html
2 Likes
Thanks Russell. You as well.
2 Likes
